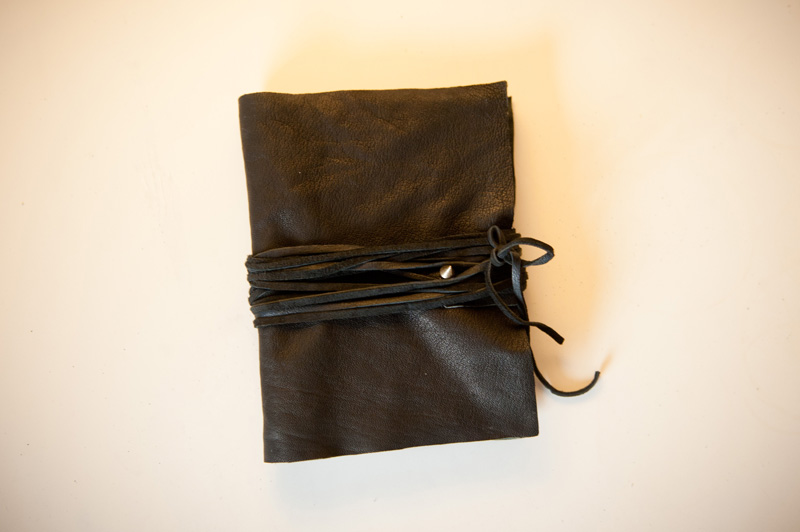
Since spying the Hermès Ulysse notebook cover a little while ago, I’ve not been able to get it out of my mind! My only issue with it was the price, I know I’m paying for the superb quality that Hermès is known for, but it’s really not justifiable to me at the moment. Honestly though, even if I had all the money in the world I don’t think I’d be able to bring myself to spend £150-£300+ for what is basically a very nice piece of leather with a few press-studs attached & a Hermès logo. Especially not when it’s so easy to DIY!
My notebook comes with me everywhere, so I thought I’d take inspiration from this & make myself something similar. As I’m making it from scratch I wanted to make it a bit more in keeping with my own aesthetics. I love the clean lines & minimalist look the Hermès has, but I’m a sucker for leather items that look battered & distressed, plus I had the perfect bit of scrap leather for the job! This took literally 20 minutes & there’s no sewing required!
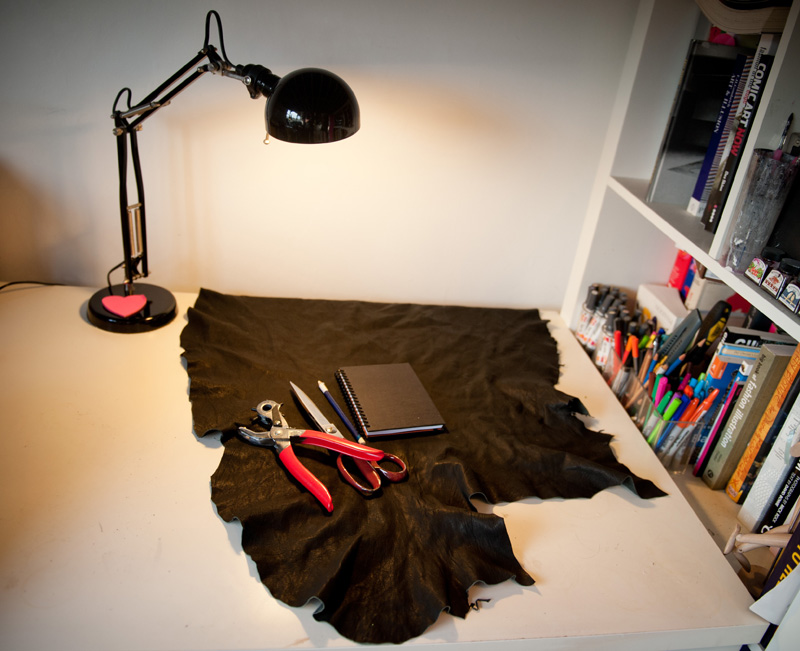
Supplies : Leather (at least enough for you’re notebook) / Notebook / White pencil or chalk / Shears / Hole punch
If you don’t have shears, make sure you have either a rotary cutter, or a good pair of scissors that will slice through the leather & not just tear it. The hole punch is optional, depending how you want to fasten it, though if you don’t have one, anything sharp that will stab through the leather will work.
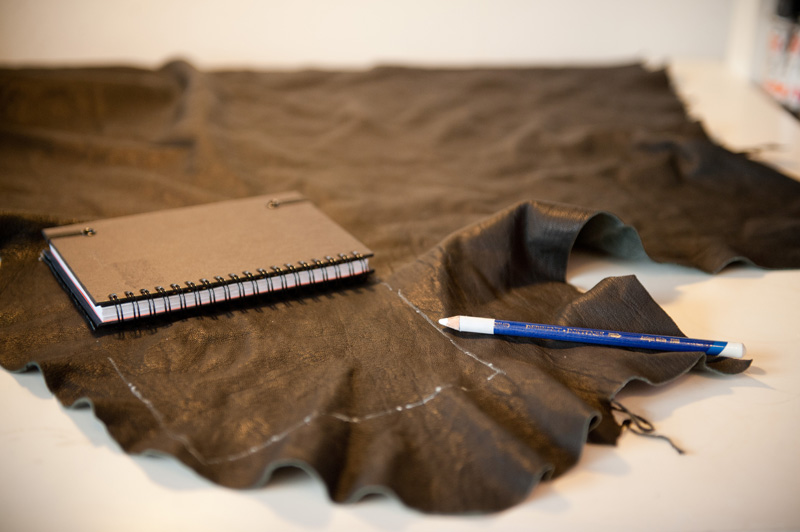
Take your closed notebook & draw around one side with the pencil. When you come to do the other side, this is really important, don’t simply flip it over. You need to ‘roll’ it on its spine over to the other side, this way you’re accounting for the fabric needed to cover it when it’s closed. Notice how the rings on mine don’t match up to where I stopped drawing & there is quite a gap. You’ll know it’s right if when you open the book out flat & place it on top, it looks as though the leather is a bit wider than it should be.
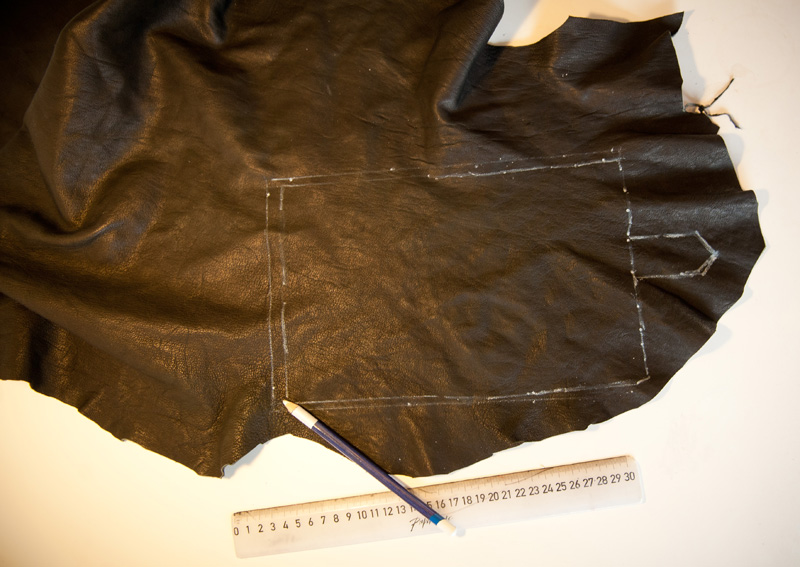
Once you’ve traced around the whole book, add a little allowance around the edges. I added 0.5cm, just so that the leather would hang over & the book would be totally covered. If you want to add a tab to fasten it like I have, draw that on too. Don’t worry about being neat! I wanted a distressed look to mine, so I did the seam allowance by hand so that it wasn’t perfectly straight & even all over, but if you want a super neat finish like the Hermès one, use a ruler.
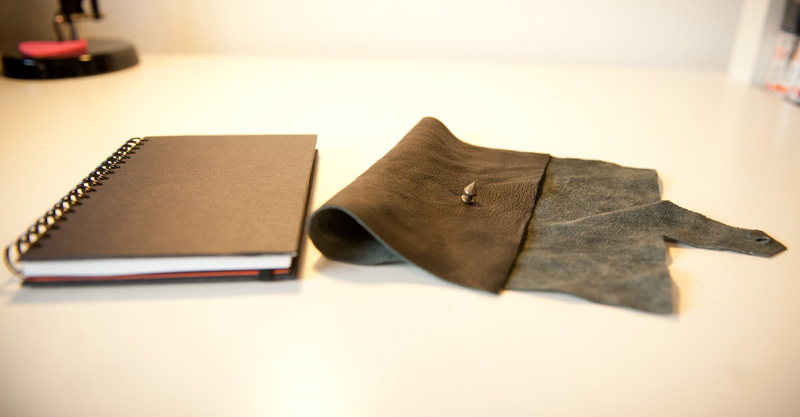
Cut it out & wipe off the pencil. You can fasten it however you like, press-studs, buttons, clips, buckles, studs, the options are endless. I used a spike stud for mine, purely as it was lying around! For this type of fastening, punch (or skewer) a hole in the tab as wide as the stem underneath the spike. Make a small slit, about a few millimeters in length, out from the hole. This allows the bigger part of the spike to fit through the hole. Fold the tab over to where it would be when the books fastened & mark. Then punch another hole & attach the spike.
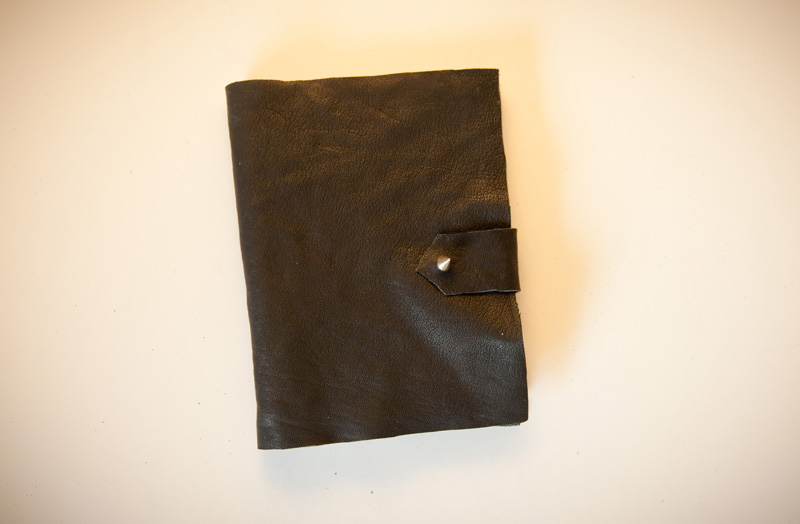
Wrap it around your notebook & you’re done! I chose to wrap some leather lace around mine too (first image), as the leather was very thin & floppy, just to keep the notebook from slipping out when it’s in my bag & I think it adds nicely to the old & distressed look too. There’s lots of other ways you can do this if you want a more secure cover also, or you could glue it on & make it permanent!


Duck says
Love this, very chic! You could probably sell these…
Wynne Prasetyo says
oh dear, this DIY is the most useful transformation i’ve seen! inspiring!
http://WWW.FASHIONGEEKSCLOSET.COM
Yuliya says
Wow love it !
Bisous
Yu’
Carola says
Well done! I would buy it!:)
Heartbeats from Vienna Wedekind
FAIIINT says
Aw, thank you! That’s such a lovely compliment! :)
silhouette says
great post!!
steph says
i actually like your version more than the hermes one – it has way more character! would love to make myself one; and last week i saw another leather tutorial so i think i’m going to have to find some scrap leather this weekend!
FAIIINT says
Aw, that’s really nice to hear! I love the Hermes one but I agree, I prefer things with a little more character myself & I didn’t want to directly rip it off, even if it is a DIY!
Definitely make one, it really is super quick & simple, good luck finding some leather! :)
A's Fashion Files says
This is such a great DIY! You did an amazing job!!
:)
Allison
P.S. I’m having a $75 Shopbop giveaway on my blog, so don’t forget to enter! :)
A’s Fashion Files
$75 Shopbop Giveaway!
ylenia says
So cool, thanks for sharing!
XOXO
Ylenia
Hope you will take a look at my latest post and let me know what you think, I’ll be happy to read your opinion!
Akaleistar says
Love this!
Dasha Gold says
This is great babe! I am gonna try that! Following you on Bloglovin’
xx
D.G.
http://www.thetrendspotter.net
Maria says
Love this, I would never have thought to do a DIY though!
Maria xxx
victoria says
DIY all the way! You did a great job and it has more character and personality :)
Paola says
Ok, I am trying this for sure! I gave my mom for her birthday the Hermes one, but for me the DIY will have to do (I am still trying to find a place to buy leather in Mexico… but apparently I will have to go north… ugh!)
xxPaola
http://www.ThePvdHJournal.com
FAIIINT says
Wow, lucky Mom! :) I don’t know why, but I would have assumed leather would be easy to come across in Mexico! I get most of mine from a guy in Italy on Ebay, mostly remnants, he ships worldwide I think – so I guess if he can ship it to you, try there. Good luck getting some!
Paola says
I thought so to before I moved! I was told that in the north of Mexico there is a lot of leather, and I can even find more exotic ones (like ostrich!!!) for reasonable prices!
ps. I used your IFB tutorial when formatting my new wordpress blog (has been a bit of a nightmare to migrate though!) xx
FAIIINT says
Oh wow! Definitely worth a trip then! I love ostrich leather, but it is pretty hard to come across for a good price. Look forward to seeing what you get!
Oh, I’m glad it’s been useful for people! If you’re still having trouble with anything, feel free to drop me an email & I can help you out with anything you’re stuck on! :)
jade says
I live for your diy’s!
jadepurplebrown.com
NotJustAPrettyDress says
I’m a fan of this kind of notebook cover and you did a great DIY project. Loved the stud detail, which is so very you!
megan, tfdiaries says
great idea
Xo Megan
Miranda says
Great idea! Thanks for sharing love :)
XX,
Miranda
Tonya says
Ahh this is such a cool & unique DIY. Great idea and such a wonderful blog!!
Ananasa says
Amazing! Love it!
http://www.ananasa.com- Home for Handmade